
🔧 Usage

This document covers the basic usage of the synapse library, creating entities, managing configurations, and attaching to events. It provides detailed examples and explanations to help users effectively implement and utilize the synapse library in their applications.

💡 Basic Example

Quick and dirty everything that's needed to set up a new entity

export function ExampleService({ logger, context, synapse }: TServiceParams) {
synapse.button({
context, // context is required
name: "Press me", // name is required
press: () => logger.info("That tickles!"), // doing stuff is optional
});
}

Config properties will vary by domain, but common ones are:

ConfigDescription
unique_idUsed to uniquely communicate this entity separate from entity ids
suggested_object_idInfluence the entity id generation
nameFriendly name
entity_categoryDiagnostic or configuration
device_idOptional secondary device to list against
iconEntity icon
attributesSecondary attributes to attach to entity (these can but shouldn't change)

⚙️ Config Setting

There are a number of ways to configure and manage entities depending on the particular needs of the application. Some properties must remain constant, such as unique_id, but other properties are intended to be updated at runtime.
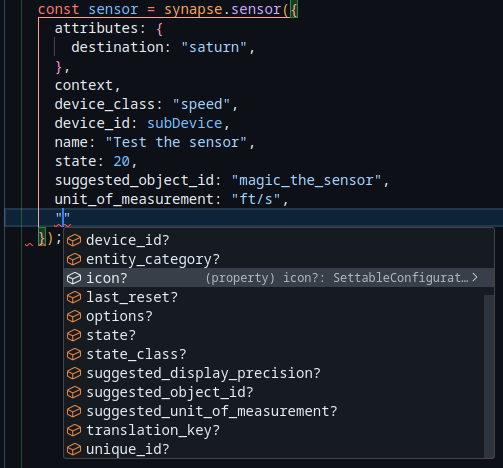
📑 Inline Static

The inline configuration format gives you access to all the options available to this entity. If it can be set for this entity, the option is available here.

full sensor options

🔄 Runtime Updates

For properties allowed to update at runtime, they are made available on the return object.

const binary_sensor = synapse.binary_sensor({
// set default state
is_on: false
});

event.on("my_event", () =>
// read and write to the same property
binary_sensor.is_on = !binary_sensor.is_on
);

Synapse will automatically flush the configuration update to Home Assistant in the background.

🔄 Reactive Updates

The final method of attaching entity updates is by providing a function to automatically recalculate the value when it updates.

In the below example, the binary sensor will listen for updates from 2 other entities. One is a native entity provided by Home Assistant, another is a synapse entity we just created.

The state of the binary sensor depends on some combination of the two states.

const entityA = hass.refBy.id( ... );
const switchB = synapse.switch( ... );
synapse.binary_sensor({
is_on: {
onUpdate: [entityA, switchB],
current() {
return switchB.is_on ? entityA.state === "away" : false;
}
}
});

The value will recalculate every 30 seconds in addition to whenever update events happen.

🔔 Event Binding

Some domains have the ability to send events back to the application to trigger events. Some examples may be button.press, switch.toggle, number.set_value, etc.

More verbose entity information about specific events can be found in the Home Assistant developer docs (example entity). You are able to set listeners for incoming events using a variety of methods.

📎 Inline

Bindings can be placed alongside the configuration in the definition using the event name. All data provided by hass as part of the service call is passed through.

synapse.select({
select_option({ option }) {
logger.info({ option }, "Option was selected");
}
});

📎 Dynamic

The dynamic attachment gives access to the same calls, using the onEventName camel case format. Dynamic attachments are easily detached using a provided remove function in the 2nd param or remover.remove().

const switchEntity = synapse.switch( ... );
const remover = switch.onTurnOn((data, remove) => {
//
});

🛠️ Managed Domains

Certain domains have a managed flag available as part of their definitions. This boolean (default: true) will automatically set up listeners for incoming events, and automatically update the state accordingly.

If you want to disable all automatic logic and fully take over state management, make sure to turn this off.

🖥️ Secondary Devices

In order to further group together entities logically within Home Assistant, you can generate dedicated artificial devices to register.

const subDevice = synapse.device.register("sub_device_id", {
name: "Example sub device",
...options
});
synapse.sensor({
device_id: subDevice,
});

This device will be registered as being provided via_device of the application default device.